Using ImageMagick for PDF redaction
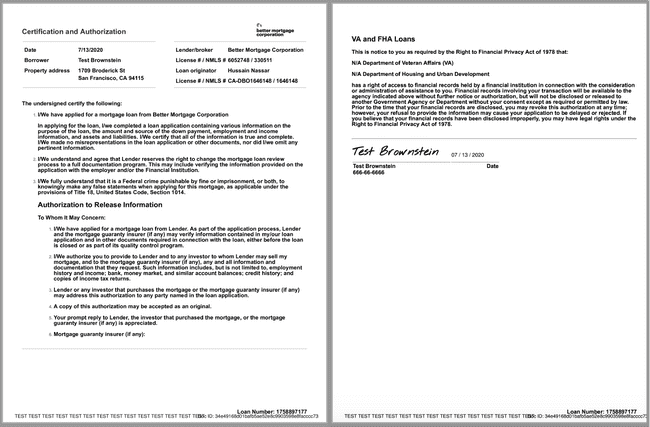
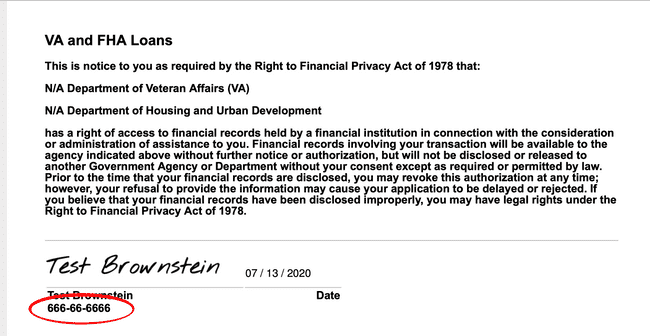
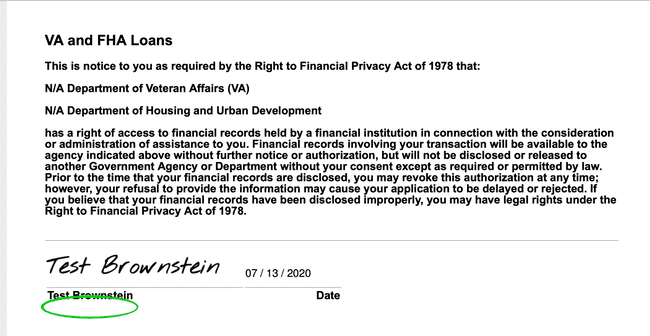
Automating document redaction with a classic command line toolThe modern mortgage includes many parties. Originators, appraisers, title companies, and real estate agents all need to understand various pieces of the puzzle in order to work together to produce and finalize a loan. This means that mortgage companies need to share documents such as a borrower’s Certification and Authorization (a document that certifies that the applicant has applied for a mortgage and authorizes some of the information to be shared with third parties), but need to do so without revealing unnecessary borrower PII (Personally Identifiable Information). PII is any data that can identify a specific individual, but some PII is more sensitive than other data, and we make sure that we release it to our partners on a strictly need-to-know basis. In our case, the Certification and Authorization form contains a social security number at the time of signing, which needs to be redacted prior to the document’s circulation to some partners.
Naturally, after doing this manually for some time we wanted to automate the process to improve efficiency. Although we could have had the borrower sign twice, we wanted to explore a maximally convenient approach. Unfortunately, tools like Adobe Acrobat don’t do a very good job of providing a mechanism for doing this (possibly by design), and many other tools simply add a shape over the area to be redacted without removing the text information. We needed a solution that would completely remove the text data.
Enter ImageMagick
Fortunately, we stumbled across a blog post with a partial solution. How (and why) I Redacted 488 PDFs Using Image Magick and Paint pointed to ImageMagick, a classic command-line tool for modifying images, as a convenient PDF rasterizer. A few more minutes of googling demonstrated that it was both possible and easy to use ImageMagick to draw boxes over parts of an image - even when only one page of a document needs to be modified - and convert the rasterized image to a PDF. Since these PDFs did not need to be text-selectable - and we generate the documents ourselves and use e-signing, meaning that the redaction area is in a predictable area - this was essentially the entire conversion process for us.
We found that the following basic gist was ideal for doing this:
magick \ -density 300 \ "cert-and-auth-combined-signed.pdf[0-1]" \ -fill white \ -draw "rectangle %[fx:(t==1?155:0)],%[fx:(t==1?1300:0)] %[fx:(t==1?500:0)],%[fx:(t==1?1350:0)]" \ -compress ZIP \ "result.pdf"
Let’s break down what we’re doing here.
magick
Call Imagemagick
-density 300
Set the working DPI to 300 pixels per inch
"cert-and-auth-combined-signed.pdf[0-1]"
Open pages 1-2 of our source file
-fill white
-draw "rectangle %[fx:(t==1?155:0)],%[fx:(t==1?1300:0)] %[fx:(t==1?500:0)],%[fx:(t==1?1350:0)]"
This gets a little more complex. We set the fill, and then use an FX expression to set coordinates based on a ternary based on whether we are on the second page, with all other pages getting an empty rectangle in the top left.
-compress ZIP
Use ZIP compression internally
"result.pdf"
Specify the output file
Pitfalls
Unfortunately, we found that when we sent the document via email, the second page of our signed document was appearing blank in previews, and couldn’t be opened in Adobe Acrobat. It turned out that the second page was being processed and encoded in grayscale while the first was in 16-bit sRGB, so we added a -colormode RGB flag and the issue was resolved.
Turning it into a microservice
Working from the command line is all fine and good, but to incorporate this into our loan processing flow, we needed to be able to queue up redactions from our mortgage workflow engine. We also wanted to isolate the process for performance and security reasons. At Better, we use ActiveMQ for queueing and an internal service for secure document storage, so the final flow consisted of the following:
Enqueue the conversion job from the mortgage engine, with a key to the encrypted signed borrower cert and authorization document.
- Consume jobs from the queue in a Typescript-based microservice.
- Download the signed document using the key in the job and a shared secret provided by local configuration.
- Run Imagemagick on the document to redact the SSN using child_process.exec.
- Upload the redacted document to our encrypted file store using a new document key and the same shared secret.
- Enqueue a job in the mortgage engine to use the document to finalize the workflow activity that requested the redaction.
- Finalize the workflow.
Conclusion
Although tools like ImageMagick are starting to age, they can still be invaluable for dealing with PDFs. If your requirements match ours, definitely give it a try!

Our thinking
Welcome home to Diane Yu, Better’s new CTO
Ali Motto, Senior Manager, Product and Technology Operations sits down with Diane Yu to learn more about what motivated her to join Better and what she’s most excited about.Tue Apr 27 2021—by Ali Motto5 min read- cto
- leadership
- interview
Upserts in Redshift
Redshift doesn't support upserts (updates + inserts) but using a few tricks we can implement it anyway.Wed Aug 28 2019—by Erik Bernhardsson1 min read- sql
- python
Wizard — our ML tool for interpretable, causal conversion predictions
Building an end-to-end ML system to automatically flag drivers of conversionFri Dec 27 2019—by Kenny Ning6 min read- data
- python


